
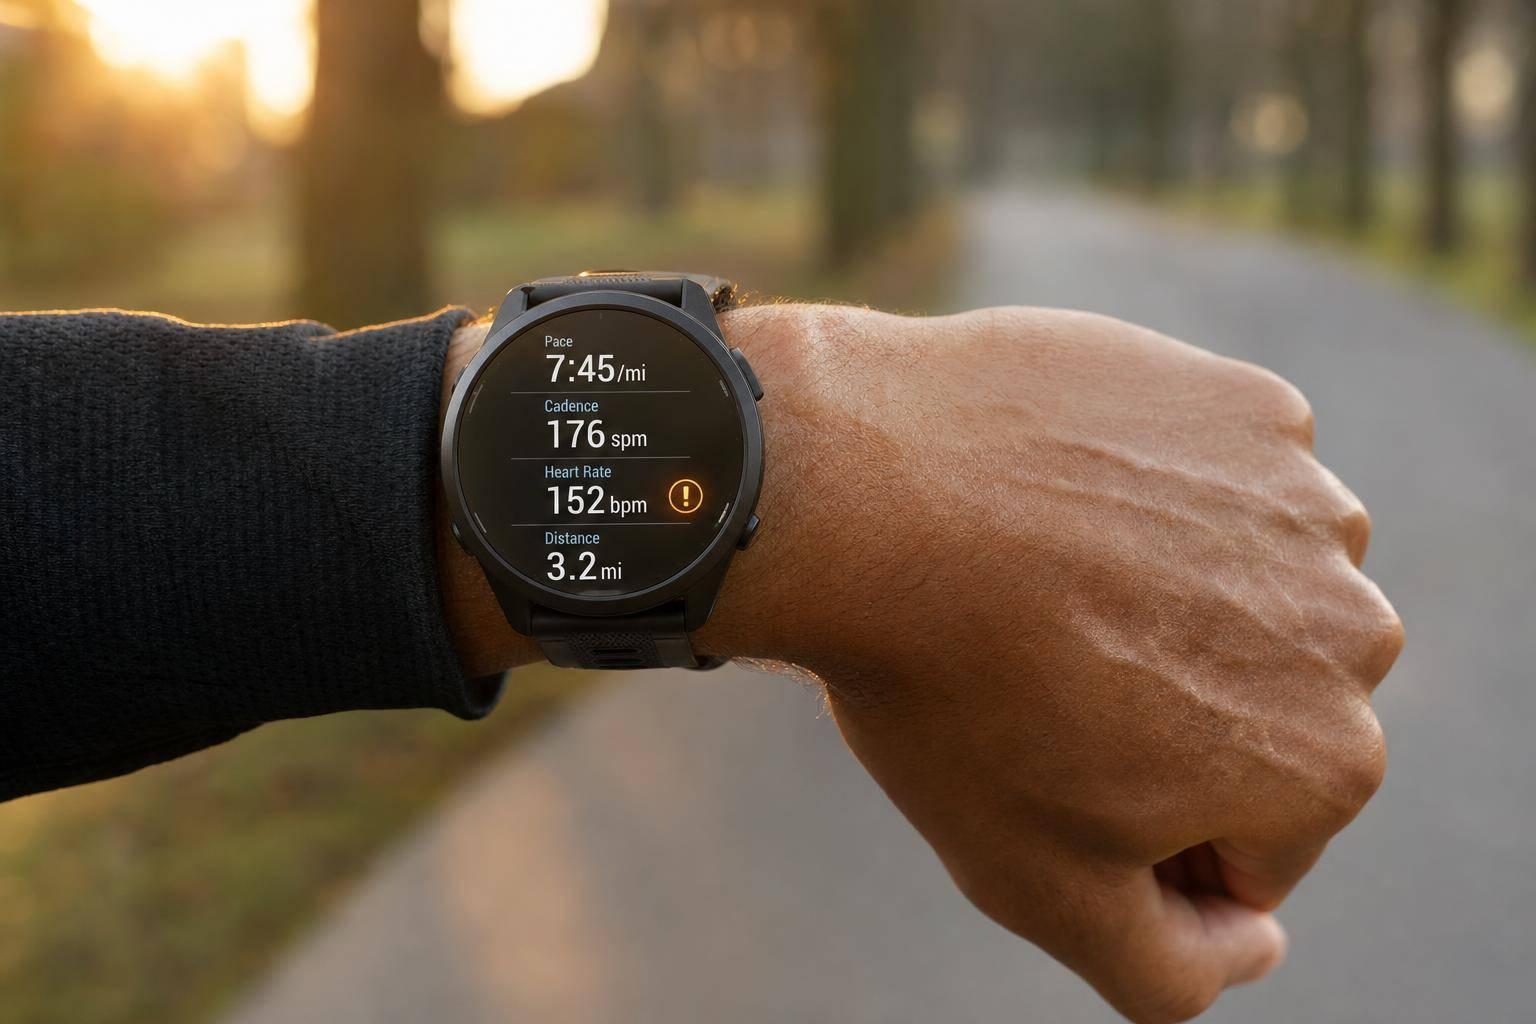
If I had to sum this up in one line: use 2 to 4 live metrics, set simple alerts, and let your wearable help you fix problems during the run instead of after it.
Most runners already see pace, heart rate, cadence, and distance. But more data does not always mean better training. What helps most is live feedback you can act on right away: slow down, hold pace, shorten your step, or ease effort. For many runs, the best setup is simple:
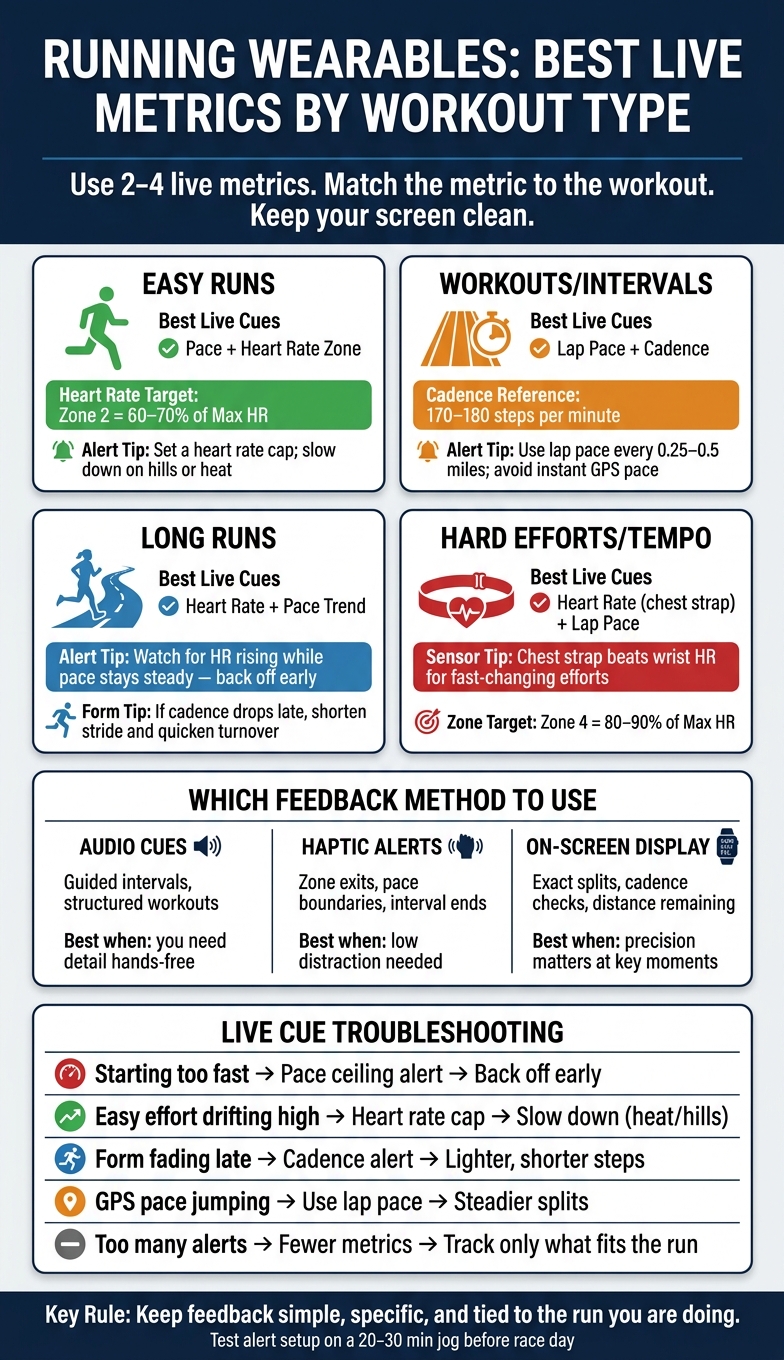
- Easy runs: pace + heart rate cap
- Workouts: lap pace + cadence
- Long runs: heart rate + pace trend
- Hard efforts: chest strap beats wrist heart rate for cleaner readings
- Form data: use it more for weekly patterns than mid-run fixes
A few numbers from the guide matter right away:
- Zone 2 usually sits around 60% to 70% of max heart rate
- Zone 4 usually falls around 80% to 90% of max heart rate
- A common cadence reference is 170 to 180 steps per minute, though your own norm matters more
- Pace alerts often work better when based on lap pace every 0.25 or 0.5 miles
- A 20- to 30-minute test run can show if your alerts are too noisy
What this means for you is simple: match the metric to the workout, match the alert to the moment, and keep your screen clean. Audio works well for guided intervals, haptics work well for limit alerts, and on-screen checks work best in short glances.
Here’s the short version:
| Focus | Best live cue | What to do |
|---|---|---|
| Starting too fast | Pace ceiling | Back off early |
| Easy effort drifting high | Heart rate cap | Slow down, especially in heat or hills |
| Form fading late | Cadence alert | Use lighter, shorter steps |
| GPS pace jumping around | Lap pace | Use steadier splits |
| Too many alerts | Fewer metrics | Track only what fits the run |
I’d treat the whole article as one rule: keep feedback simple, specific, and tied to the run you are doing.
Running Wearables: Best Live Metrics by Workout Type
Do Wearables Actually Improve Performance?
sbb-itb-f5765c6
What running wearables measure and which metrics matter most
The live data that helps most during a run usually falls into three buckets: pace, effort, and form. In plain terms, that means pace, heart rate, and form metrics. The big win comes from knowing what each number is actually telling you.
Pace, heart rate, and effort metrics for daily training
Pace usually shows up as current pace, lap pace, or average pace.
Current pace reacts to changes right away, which is handy when you speed up or slow down. The catch is that it can jump around if GPS gets a little messy. Lap pace is steadier, so it tends to work better for workouts. Average pace makes more sense on long runs, where you care more about the full effort than every small swing.
Heart rate helps you check whether the effort fits the workout. Live heart rate zones show whether your body is working at the right level for that session. A common 5-zone framework looks like this[1][2]:
| Zone | Intensity | % of Max HR | Best Used For |
|---|---|---|---|
| Zone 1 | Recovery | Below 60% | Warm-ups, cool-downs |
| Zone 2 | Easy/Aerobic | 60–70% | Base mileage, easy runs |
| Zone 3 | Moderate/Tempo | 70–80% | Steady-state efforts |
| Zone 4 | Threshold | 80–90% | Tempo runs, hard efforts |
| Zone 5 | VO₂max | Above 90% | Short, high-intensity intervals |
Use these zones to keep easy runs easy and hard runs hard.
Pace tells you how fast you're moving. Heart rate helps show how hard you're working. That difference matters a lot, especially on hot days, hilly routes, or tired legs.
Pace tells you how fast you're moving; cadence tells you how efficiently.
Cadence, stride, and form data
Cadence, or steps per minute, is usually the form metric runners can use most easily during a run. A cadence of around 170–180 steps per minute is a common reference point[3][4], but there isn't one perfect number for everyone. Height, speed, and your own mechanics all play a part. So instead of fixating on one run, watch the trend over time.
Some wearables also track deeper form data, including vertical oscillation (how much your torso moves up and down with each stride), ground contact time (how long your foot stays on the ground, measured in milliseconds), and ground contact balance (how evenly that time is split between left and right)[3][4].
A few patterns tend to be useful:
- Lower vertical oscillation at the same pace often points to better running economy.
- Big left-right differences in ground contact can hint at fatigue or a developing imbalance.
- These numbers work best as trend data across weeks, not as something to fix on the fly in the middle of a run.
That last point is easy to miss. If one number looks odd on a single day, it doesn't always mean something is wrong. Most coaches look for patterns first.
The sensor matters too, because not every device captures these metrics with the same accuracy.
Where the data comes from
Wrist watches are easy to use and work well for pace and basic heart rate. But for hard efforts, chest straps are more accurate. They read the heart's electrical signals directly, which makes them the best option for intervals and tempo work where effort can change fast. Many chest straps also include motion sensors for running dynamics such as vertical oscillation and ground contact time.
Foot pods can sharpen cadence and stride data, especially on treadmills or routes where GPS struggles.
For most runners, a simple setup works fine:
- A GPS watch for pace and general run data
- A chest strap if heart rate accuracy matters to you
- A foot pod only if you want tighter cadence data
Whatever setup you use, make sure the gear fits snugly. It's also smart to check pace now and then against a known distance, like a measured track, so you can spot any clear sensor drift.
How to use live feedback to improve pace, form, and endurance
Once you know which metrics matter, the next step is simple: turn them into cues you can use during the run, not just after it.
Using alerts to stay on pace
The most common pacing mistake is going out too fast. One easy fix is to set a pace alert with a ceiling, not just a goal. For an easy run, make the first-mile alert a bit slower than your usual pace so those opening miles stay under control.
For workouts and races, use lap pace instead of current pace. It’s steadier and less jumpy. Set a lap pace range that’s tight enough to keep you honest, but not so tight that every hill, turn, or bit of GPS wobble sets it off.
And when the watch beeps, don’t treat it like an order. Treat it like a nudge. Make a small correction instead - a slightly faster turnover, a calmer breath, or a softer grip - instead of shifting gears all at once.
Pace helps keep the run under control. Cadence helps keep your mechanics from slipping.
Using cadence and form cues without overthinking
Don’t try to fix every form issue in one run. That’s a fast way to get stuck in your own head. Pick one form cue for that session, not a full rebuild of your stride.
Use cadence as a live cue only when it starts drifting from your usual range. If your cadence tends to fall late in a workout, set a low-cadence alert a few steps per minute below your normal easy-run average. When it buzzes, use one cue - quicker, lighter steps or landing under your hips - for 30 to 60 seconds, then let it go.
Make cadence changes little by little. One small tweak at a time works better than forcing a big shift. Watch the trend, not one single reading.
Using heart rate to protect aerobic effort
On easy runs and long runs, heart rate matters more than pace because it shows effort, not just speed. Set an upper heart-rate cap on easy days to keep the effort aerobic. On hot, humid, or hilly routes, heart rate can climb even if pace stays the same. That’s fine. It means you can keep the effort where it should be, even when the pace has to change.
On longer efforts, heart rate and cadence make a good early warning pair for fatigue. If heart rate rises while pace stays steady, back off a little. If cadence starts to drop late in the run, shorten your stride and quicken turnover instead of reaching for bigger steps. The point is to stop a rough patch from snowballing, not to play detective after the run is over.
If you want recovery signals next to your training data, put them in one view. Healify can combine heart rate, sleep, and stress data to show when effort should stay conservative.
Audio, haptic, or on-screen: which feedback method works best
Your watch, headphones, and screen can all guide you during a run. But they don’t do it in the same way.
Audio cues are spoken prompts or AI-driven nudges through headphones or a device speaker. Haptic alerts are vibrations from your watch. On-screen visuals are the numbers you check on your display. Each one pulls a different amount of attention. So the goal isn’t just to use every feature your device offers. It’s to use the channel that delivers the cue with the least distraction.
Once you know which metric you want to track, choose the feedback method that fits the workout.
Audio cues for pacing and guided workouts
Audio works best when you need frequent, structured guidance and don’t want to keep looking at your wrist. A spoken prompt like "speed up to 8:00 per mile for the next 2 minutes" gives you more detail than a vibration and causes less disruption than checking a screen over and over.
There’s one catch: safety. Audio can cover up traffic noise or trail sounds. If you’re on busy roads or technical trails, use less of it or skip it.
Haptic alerts for simple, low-distraction corrections
Vibration alerts don’t stop your music and don’t ask you to look at anything. That makes them a good fit for boundary-based alerts: a buzz when your heart rate moves out of your target zone, a tap when your lap pace slips too slow, or a signal when an interval ends.
The downside is simple. Haptics are binary. A vibration tells you that something changed, but not by how much.
On-screen displays for quick checks at key moments
The screen gives you the most detail: current pace, split time, distance, heart rate, cadence, and more in one place. But every glance costs you a bit of visual attention.
That trade makes sense at the right times. Early in an interval, you might check the screen to make sure you’re on target. Late in a long run, you may want to see how much distance is left. Mid-workout, it can help to check a form metric like cadence or ground contact time.
Many runners do best with a mix: haptics for zone warnings, audio for interval cues, and a quick screen glance for exact splits. Match the cue to the workout, and keep the alert simple.
How to set up your wearable for better runs and fewer data problems
Once you know which cues matter, set up your watch so it shows only those signals. Start with the basics: a snug fit, a locked GPS signal, and a resting heart rate that looks believable.
Pick 2 to 4 live metrics instead of tracking everything
Show only the metrics that guide the workout.
For easy runs, pace and heart rate zone are usually enough. For intervals, lap pace and cadence help keep each repeat honest. On race day, total time and average pace are often all you need.
A lot of running watches let you build separate activity profiles for different run types. That means you don't have to change every setting before each session.
Once the screen is set, add alerts that step in only when effort starts to drift.
Set alerts that are useful, not constant
Set alerts wide enough to guide you without turning the run into a stream of buzzes.
For pace, use a range like 9:00–9:30 per mile. Also, trigger alerts from lap pace every 0.25 or 0.5 miles instead of instant GPS pace. Instant pace can jump around too much to help in the moment.
For heart rate, one zone-exit alert is often enough. For example, a buzz when you move above Zone 2 is usually less distracting than constant beeping.
Before a long run or race, test your setup on a low-stakes 20- to 30-minute jog. That's the easiest way to catch alerts that go off too often or feel too weak to notice.
It also helps to turn off non-running notifications during workouts. Texts and app alerts can pull your attention away from the cues that matter most.
Conclusion: Keep feedback simple, specific, and matched to the workout
Real-time feedback works best when it's sparse and specific. Pick a small set of metrics that fit the workout, set alert ranges wide enough to avoid constant noise, and let the device handle the rest in the background.
After the run, that's when deeper data becomes more useful, like cadence trends, heart rate drift, and split-by-split pacing. For recovery context, Healify can combine wearable and lifestyle data into one view.
FAQs
How do I find my heart rate zones?
Start by figuring out your maximum heart rate. A lot of wearables set heart rate zones on their own with age-based formulas, and that’s a decent starting point. But if you want numbers that fit you, it helps to calibrate the device with your own fitness data.
Heart rate zones are usually set as percentages of your maximum heart rate. For example, Zone 2 is often 60%–70%, while high-intensity work usually starts above 85%. Wear your device on a regular basis so it can fine-tune those zones based on your resting heart rate and recovery patterns.
Should I trust wrist heart rate on hard runs?
Wrist-based wearables make real-time heart rate tracking easy. But during hard runs, they’re often less reliable than chest straps. Fast arm movement, sweat, and a loose fit can throw off the sensor.
If you want cleaner data, wear the device snug against your skin and keep the sensor clean. And if you need the most precise readings during intense efforts, a chest strap is usually the better pick.
What metrics should beginners track first?
Start by wearing your device every day for at least two weeks. That gives you a personal baseline for resting heart rate, sleep duration, and activity levels.
From there, pay attention to HRV, sleep stages, resting heart rate, and daily step count. These numbers can show how well you’re recovering, how much stress your body may be under, how well you’re resting, your cardiovascular baseline, and how much you’re moving day to day.